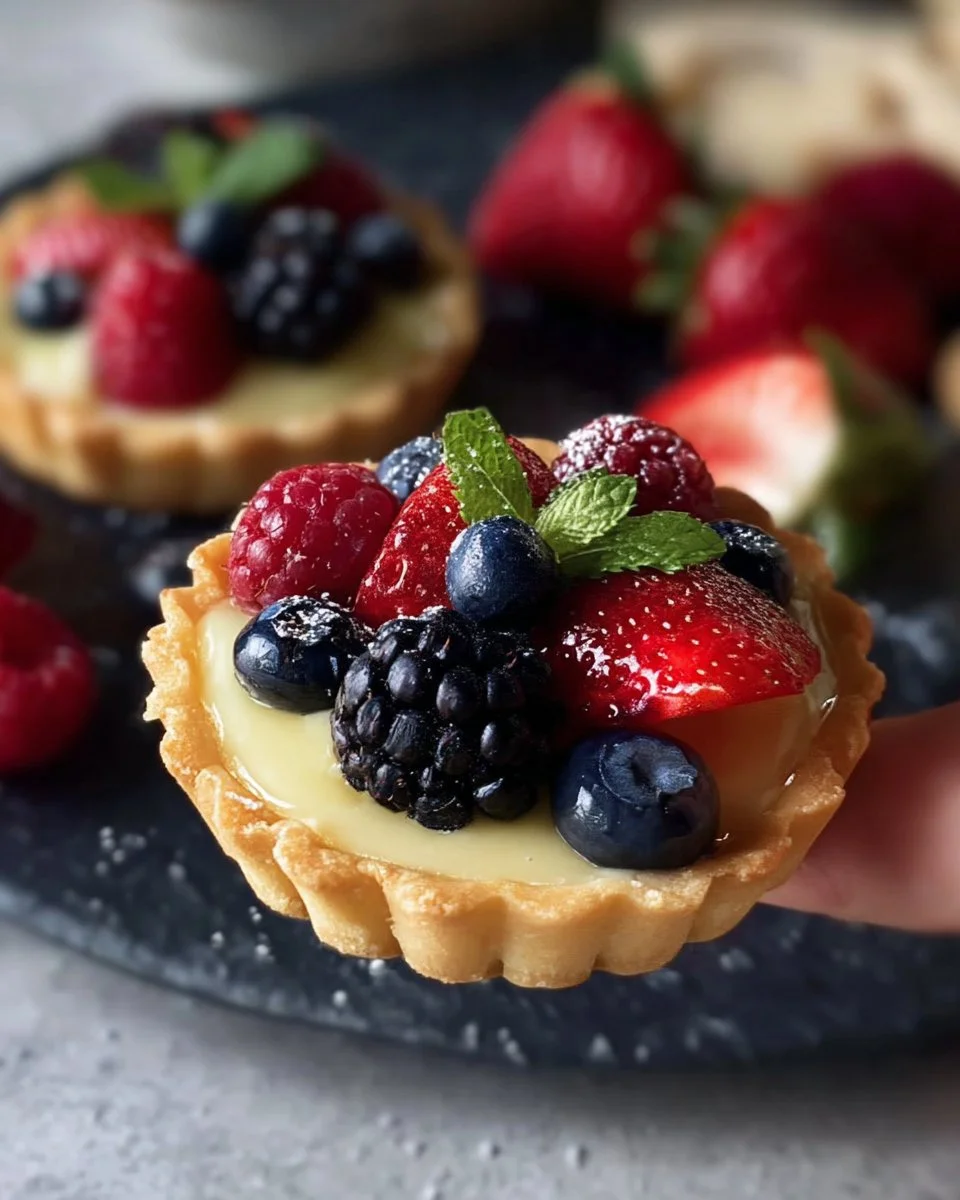
There’s something truly special about these Berry Custard Tartlets. With their delicate, buttery crusts cradling a rich and velvety custard, topped with vibrant, juicy berries, they are a feast for the senses. As you take a bite, the sweetness of the berries mingles with the creamy custard, creating a delightful symphony of textures and flavors. I find myself making these little gems for family gatherings, brunches, or just a lovely afternoon treat with a cup of tea.
These tartlets come together surprisingly fast, making them perfect for busy weeknights or whenever you want to impress friends and family without spending hours in the kitchen. Not to mention, they are incredibly versatile; you can swap out the berries depending on the season or your mood. And if you have leftovers (which is rare!), they hold up beautifully in the fridge for a couple of days.
Why I Love Berry Custard Tartlets
Making Berry Custard Tartlets is not just a baking task; it’s an experience! The ease of crafting these beauties makes them a go-to in my kitchen. They capture a wonderful balance of sweet and tart, which hits that sweet spot for all dessert lovers. Plus, there’s something undeniably elegant about serving these cute little tartlets. They are a true winner at my table, perfectly brightening any occasion!
Berry Custard Tartlets Ingredients
The magic of this Berry Custard Tartlets truly lies in the harmony of its ingredients. Each one plays a vital role in creating that lush custard and crispy shell. Don’t worry about exact measurements just yet; those are all in the recipe card for you!
Core Ingredients and Their Roles
- 2 LARGE EGG YOLKS: These are the stars of the custard, providing richness and a creamy texture.
- 1/3 CUP (65 GR) SUGAR: A touch of sweetness that balances the tartness of the berries.
- 2 TABLESPOONS (20 GR) CORNSTARCH (or ALL-PURPOSE FLOUR): This helps thicken the custard to give it that luxurious texture.
- 10 FL OZ (300 ML) MILK, HOT: The base for our creamy custard; the warmer, the better for blending!
- 1 TEASPOON VANILLA EXTRACT: Adds a lovely aromatic sweetness that enhances the flavors.
- 1 EGG: This bolsters the custard’s structure, creating a silky finish.
- 1/2 CUP (100 GR) SUGAR (FOR CRUST): Essential for sweetening the buttery crust.
- 4 OZ (115 GR) UNSALTED BUTTER, SOFTENED: The heart of our crust, ensuring it’s tender and flaky.
- 1 TEASPOON VANILLA EXTRACT (FOR CRUST): Complements the buttery flavor beautifully.
- PINCH SALT: A little pinch enhances the flavors and balances the sweetness.
- 1 1/2 CUPS (190 GR) ALL-PURPOSE FLOUR: The foundation of the crust, providing structure and stability.
- FRESH BERRIES (FOR TOPPING): These are the showstoppers, delivering freshness and color!
Substitutions and Tips
Need a swap? If you’re low on ingredients or want to mix things up, here are a few ideas:
- Cornstarch: You can substitute it with all-purpose flour, though it will result in a slightly less creamy texture.
- Berries: Feel free to swap in any seasonal fruits like peaches, cherries, or even sliced kiwis!
- Sugar: Coconut sugar or honey can be used for a different twist, but keep in mind they may alter the sweetness level.
- Butter: If you’re looking for a dairy-free option, you can use coconut oil; just ensure it’s at a similar softened consistency.
And remember, it’s helpful to have all your ingredients at room temperature to attain a smoother batter!
Kitchen Tools You’ll Need
- Tartlet molds (at least 6)
- Rolling pin
- Medium-sized mixing bowls
- Whisk
- Measuring cups and spoons
- Plastic wrap
- Piping bag (or a zip-lock bag with the corner snipped)
How to Make Berry Custard Tartlets
Let’s dive into creating these delicious Berry Custard Tartlets. I’ve broken down the process into simple steps to make this as easy as pie—follow along, and you’ll have a delightful treat in no time. We’re aiming for crispy crusts with beautifully rich custard that pairs perfectly with fresh berries!
Prepare the Custard Cream
First, warm the milk in a medium-sized pan until it’s hot but not boiling. In a separate bowl, whisk together the egg yolks, sugar, and cornstarch until smooth and fluffy—this step is key to avoiding lumps! Gradually add the hot milk while whisking continuously, ensuring everything blends harmoniously.
Cook to Perfection
Now, place the pan over medium heat and stir continuously. As it heats up, the custard will thicken, so keep a close eye on it to prevent sticking! Once it reaches a slow boil, lower the flame and keep stirring for another couple of minutes until you hit that perfect creamy thickness. You want it lush! Pour the cream into a glass bowl (or piping bag) and let it cool down before refrigerating it for at least half an hour.
Prep the Tartlet Crusts
While the custard cools, let’s whip up the crust! In a large bowl, beat together the egg with the sugar until light and fluffy. Toss in the cubed softened butter and beat it more until well combined. Next, add the vanilla extract, salt, and flour, mixing until the dough comes together. When it forms a nice ball, wrap it in plastic wrap and shape it into a disc. Pop it in the fridge for about 30 minutes to chill.
Roll Out and Shape
Once your dough is ready, preheat your oven to 350°F (175°C). Grease your tartlet molds with a little butter and flour or use a non-stick spray. On a lightly floured surface, roll out the dough until it’s about 1/8 inch thick. Cut out circles with a 3-inch cookie cutter, then gently press those circles into the molds, making sure to pinch the edges for a lovely shape.
Bake the Shells
Prick the bottom of each shell with a fork to prevent bubbling during baking. Place them in the oven for about 14-15 minutes until they’re just golden at the edges. Now, take a moment to enjoy the wonderful aroma filling your kitchen! Allow them to cool completely before filling.
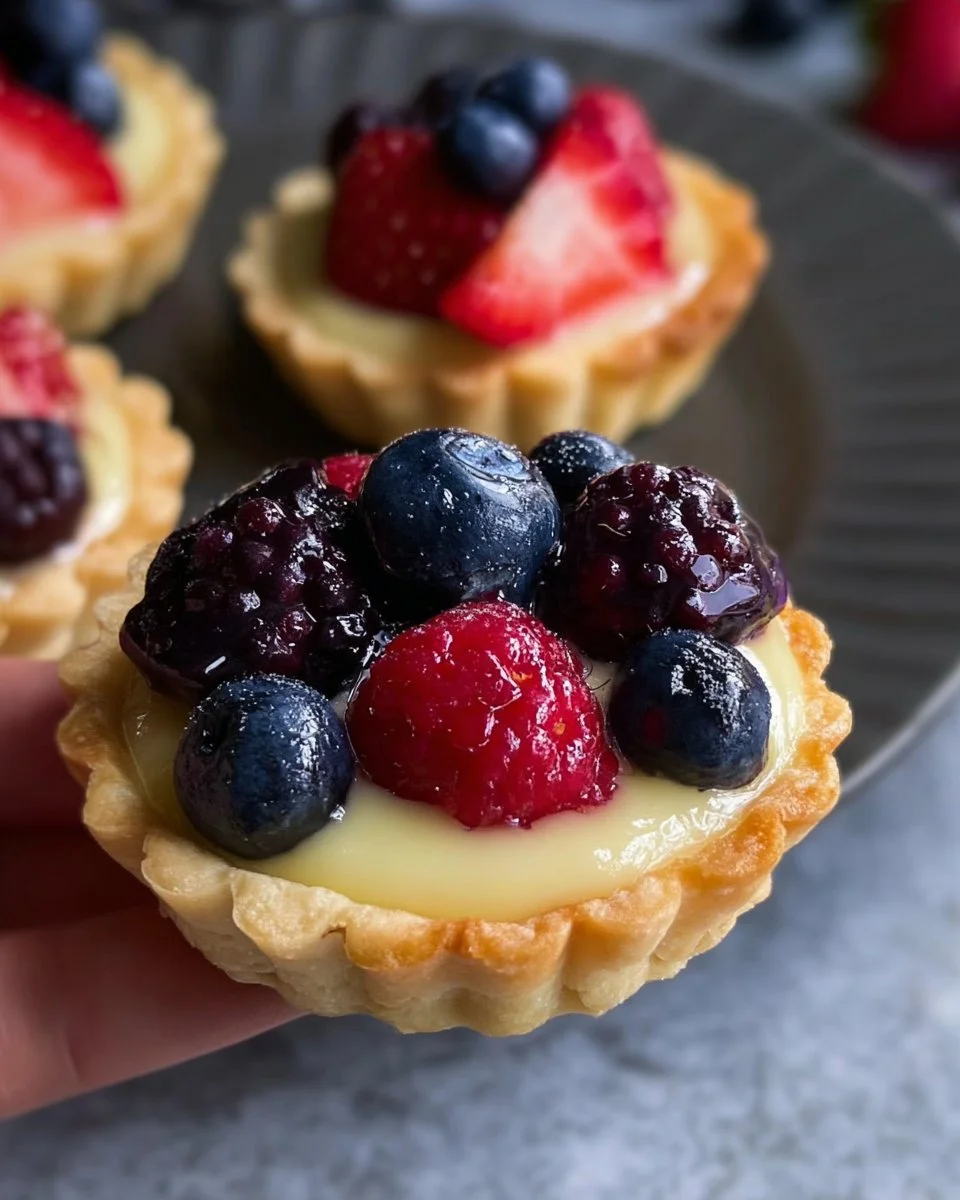
Fill and Top with Berries
Once the tartlet shells are cool, it’s time to pipe in your beautifully chilled custard cream. Use a piping bag for precision, or simply spoon it in if you don’t have one. Top generously with fresh berries of your choice; strawberries, blueberries, and raspberries all work wonderfully!
How to Store Berry Custard Tartlets
Leftover tartlets can be stored in an airtight container in the refrigerator for about 3-4 days, although they’re best enjoyed fresh! If you happen to freeze them, they can last for 2-3 months; just thaw them slowly in the fridge before serving. Reheating isn’t necessary, but if you prefer a touch of warmth, a short time in the oven at low heat can do wonders.
Tips for Success
- Stick to the recipe! Accurate measurements provide the best results.
- Don’t overbake the tartlet shells; keep an eye on them to avoid a crunchy shell.
- Use fresh, high-quality berries for the best flavor.
- Let the custard cool completely before filling the tartlets for clean, beautiful layers.
Serving Suggestions
- Serve with a light dusting of powdered sugar for a sweet finish.
- Pair with a scoop of vanilla ice cream for an indulgent twist!
- A drizzle of dark chocolate or homemade raspberry sauce can elevate these tartlets.
- Garnish with mint leaves for a pop of color.
- Complement with a refreshing glass of iced tea or prosecco for a lovely brunch.
I hope you love making and sharing these Berry Custard Tartlets as much as I do! They bring a sprinkle of joy and sweetness to any occasion—happy baking!